Punching bags are a cornerstone of fitness routines for athletes, martial artists, and home gym enthusiasts alike. Whether you’re training for boxing, Muay Thai, or simply looking to blow off steam and build strength, a quality punchbag is essential. But here’s the catch: even the best heavy bag won’t deliver results if it’s not properly mounted. That’s where a reliable punchbag wall bracket comes in.
A punchbag wall bracket is the unsung hero of any serious training setup. It’s the sturdy, often overlooked component that holds your bag securely to the wall, absorbing hundreds—sometimes thousands—of impacts per session. Without a solid bracket, your bag could swing wildly, damage your wall, or worse, detach mid-punch and cause injury. Choosing the right one isn’t just about convenience; it’s about safety, performance, and long-term durability.
In this comprehensive buying guide, we’ll walk you through everything you need to know to make an informed decision. From understanding key performance specs like weight capacity and material strength, to comparing different bracket types and avoiding common installation pitfalls, this guide is designed to help you invest wisely. Whether you’re mounting a 70-pound heavy bag in your garage or a lighter speed bag in your basement gym, we’ve got you covered. By the end, you’ll know exactly what to look for, how much to spend, and how to ensure your setup lasts for years of intense training.
The market for punchbag wall brackets has evolved significantly over the past decade. What once consisted of basic steel hooks and rudimentary mounts has now expanded into a diverse range of engineered solutions—from heavy-duty industrial brackets to sleek, space-saving designs with shock absorption technology. Brands like Everlast, Title Boxing, and Valor Fitness have stepped up their game, while newer players focus on innovation and user-friendly installation.
But with so many options comes confusion. Prices vary wildly, from under $30 to over $200. Some brackets claim to support 200 pounds, while others barely handle half that. Installation requirements differ, warranties range from none to lifetime, and user reviews often contradict marketing claims. This guide cuts through the noise. We’ll help you identify what truly matters—like build quality, load capacity, and ease of installation—and how to match those features to your specific needs. Whether you’re a weekend warrior or a professional fighter, your wall bracket should be as tough as your training.

What to Look for When Buying a Punchbag Wall Bracket
1. Weight Capacity & Load Rating
The most critical factor when selecting a punchbag wall bracket is its weight capacity. This specification tells you the maximum load the bracket can safely support without bending, cracking, or failing. Most home-use heavy bags weigh between 40 and 100 pounds, while professional-grade bags can exceed 150 pounds. Always choose a bracket rated for at least 20–30% more than your bag’s weight to account for dynamic forces during punching and kicking.
For example, if you’re using a 70-pound heavy bag, opt for a bracket with a minimum 100-pound capacity. Dynamic impact can multiply the effective load by 2–3 times due to momentum and acceleration. A bracket rated only for 70 pounds may fail under repeated stress, especially during high-intensity sessions. Look for brackets that clearly state their static and dynamic load ratings—reputable manufacturers will provide both.
Additionally, consider the type of training you’ll be doing. If you plan to use the bag for Muay Thai, kickboxing, or mixed martial arts (MMA), where kicks and knees generate more force than punches, prioritize higher load ratings. Some premium brackets are engineered with reinforced crossbars and thicker steel to handle these extreme forces.
2. Build Quality & Material Strength
The material and construction of your bracket determine its longevity and safety. Most high-quality brackets are made from solid steel, typically 10- or 12-gauge, which offers excellent strength-to-weight ratios. Avoid brackets made from thin, flimsy metal or aluminum, as these are prone to warping or snapping under pressure.
Look for features like welded joints instead of bolted connections, as welds provide superior structural integrity. Powder-coated finishes not only resist rust and corrosion but also add a layer of durability against scratches and impacts. Some top-tier models use hot-dip galvanized steel for outdoor or garage use, where moisture and temperature fluctuations are common.
Inspect the thickness of the mounting plate—this is the flat section that attaches to the wall. A plate less than 1/4 inch thick may bend under stress. Premium brackets often feature 3/8-inch or even 1/2-inch plates with multiple bolt holes for secure anchoring. Reinforced gussets (triangular supports) at stress points further enhance stability.
3. Mounting Compatibility & Wall Type
Not all walls are created equal, and your bracket must be compatible with your mounting surface. The three most common wall types are wood studs, concrete/brick, and metal studs—each requiring different installation methods and hardware.
For wood studs (typically found in homes), use lag bolts or carriage bolts that penetrate at least 3–4 inches into the stud. Most brackets come with pre-drilled holes designed for standard 16- or 24-inch stud spacing. Always mount into at least two studs for maximum stability.
Concrete or brick walls require masonry anchors, such as wedge anchors or sleeve anchors. These expand inside the wall to create a secure hold. Some brackets include these anchors, but many do not—check the packaging or product description carefully.
Metal studs are trickier. They’re thinner and less dense than wood, so standard lag bolts won’t hold. Use toggle bolts or snap-toggle anchors designed for metal framing. Alternatively, consider a freestanding bag stand if wall mounting isn’t feasible.
Pro Tip: Use a stud finder before drilling. Mounting into drywall alone—even with anchors—is unsafe for heavy bags. The bracket must be anchored into structural framing.
4. Bracket Design & Swing Radius
The design of the bracket affects how your bag moves during training. A well-designed bracket allows for natural, fluid swing without excessive wobble or resistance. Look for models with a smooth, rounded hook or swivel mechanism that reduces friction and wear on the bag’s chain or strap.
The swing radius—the distance the bag can move from side to side—should be sufficient for your training style. A narrow radius may restrict movement and cause the bag to hit the wall, while too wide a radius can make the bag unstable. Most brackets offer a 12- to 18-inch swing arc, which is ideal for general use.
Some advanced brackets feature a 360-degree swivel mount, allowing the bag to rotate freely. This is especially useful for speed bags or double-end bags, where rotational movement is part of the drill. For heavy bags, a fixed or limited-swing design may be preferable to maintain control during power strikes.
Consider the bracket’s projection from the wall. A longer arm (6–12 inches) gives the bag more space to swing, reducing the chance of hitting the wall. However, it also increases leverage, which can stress the mounting point. Balance is key—choose a projection that matches your bag size and room dimensions.
5. Ease of Installation & Included Hardware
A bracket is only as good as its installation. Even the sturdiest model will fail if not mounted correctly. Look for brackets that come with comprehensive installation hardware, including bolts, washers, and anchors. Some premium kits include a level, template, or even a video guide to simplify the process.
Pre-drilled holes should align with standard stud spacing (16 or 24 inches on center). If your wall doesn’t match, you may need to use a backing board—a piece of plywood mounted between two studs—to distribute the load. This is common in garages or basements with irregular framing.
Installation time varies. Basic brackets can be mounted in 15–30 minutes with basic tools (drill, wrench, level). More complex models with multiple components may take an hour or more. If you’re not confident in your DIY skills, consider hiring a professional or choosing a simpler design.
Always follow the manufacturer’s instructions to the letter. Over-tightening bolts can strip threads or crack concrete. Under-tightening leads to movement and eventual failure. Use a torque wrench if specified.
6. Brand Reputation & Customer Support
Not all brands are equal. Established names like Everlast, Title Boxing, and Valor Fitness have decades of experience in combat sports equipment and generally offer reliable, tested products. They also provide better customer service, clearer documentation, and longer warranties.
Newer or lesser-known brands may offer lower prices, but be cautious. Check for third-party certifications, such as ISO or ASTM standards, which indicate rigorous testing. Read customer reviews on multiple platforms—Amazon, Google, and specialty fitness forums—to spot recurring issues like poor welds, missing hardware, or misleading weight ratings.
Customer support matters. If something goes wrong—say, a bolt breaks or the bracket bends—you want a company that responds quickly and offers replacements. Look for brands with responsive email or phone support, detailed FAQs, and active social media presence.
Some brands offer installation support or partnerships with local handymen. This can be a lifesaver if you’re unsure about mounting.
7. Warranty & Return Policy
A strong warranty is a sign of confidence in product quality. Most reputable brackets come with a 1- to 5-year warranty, covering defects in materials and workmanship. Some premium models offer lifetime warranties, especially for commercial use.
Read the fine print. Many warranties exclude damage from improper installation, overloading, or misuse. If you exceed the weight limit or mount into drywall, your claim may be denied. Keep your receipt and installation photos as proof.
Return policies are equally important. If the bracket doesn’t fit your wall or arrives damaged, you should be able to return it within 30 days. Check the retailer’s policy—some charge restocking fees or require original packaging.
For high-end brackets, consider extended warranty options or purchase protection through your credit card.
8. User Reviews & Real-World Feedback
Specifications on a product page don’t always reflect real-world performance. User reviews provide invaluable insights into durability, ease of use, and potential flaws. Look for detailed reviews with photos or videos of the installed bracket in action.
Pay attention to comments about noise, vibration, and long-term wear. A bracket that squeaks or rattles after a few weeks may have loose components or poor design. Reviews from users with similar setups (e.g., concrete garage walls, 100-pound bags) are especially relevant.
Be wary of fake reviews. Look for verified purchases, detailed descriptions, and balanced feedback. If a product has dozens of 5-star reviews with identical phrasing, it may be manipulated.
Forums like Reddit’s r/homegym or r/boxing are great resources. Experienced users often share installation tips, brand comparisons, and warnings about problematic models.
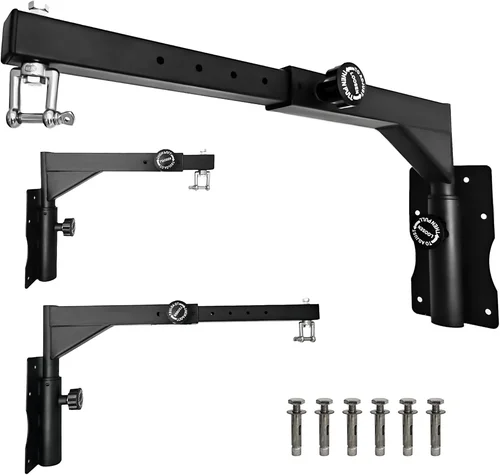
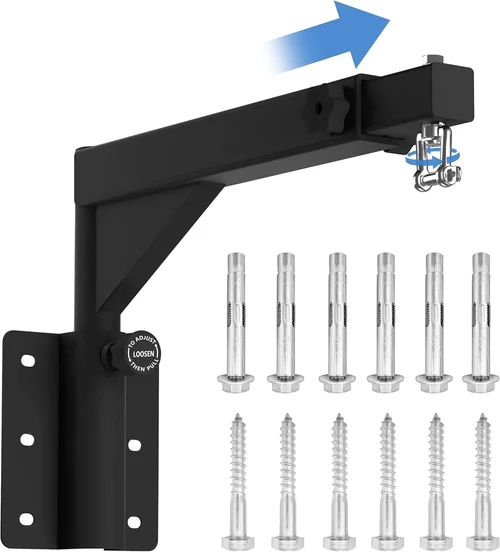
Different Types of Punchbag Wall Brackets

Common Buying Mistakes to Avoid

❌ Mistake: Ignoring Weight Capacity
Why it’s bad: Choosing a bracket based solely on price or appearance without checking its load rating is a recipe for disaster. A bracket rated for 50 pounds will fail quickly with a 70-pound bag, especially under dynamic impact. This can lead to the bag falling, damaging property, or causing serious injury.
What to do instead: Always match the bracket’s weight capacity to your bag’s weight plus a 20–30% safety margin. Check both static and dynamic ratings if available. When in doubt, go higher.
❌ Mistake: Mounting into Drywall Only
Why it’s bad: Drywall is not structural. Even with heavy-duty anchors, it cannot support the repeated forces of a punchbag. The bracket will eventually pull out, taking chunks of wall with it.
What to do instead: Always mount into wood or metal studs, concrete, or brick. Use a stud finder to locate framing. For concrete, use proper masonry anchors. If studs aren’t aligned, install a backing board between two studs.
❌ Mistake: Overlooking Installation Hardware
Why it’s bad: Many brackets don’t include the necessary bolts or anchors. Buying the wrong hardware can result in a weak mount or damage to your wall. Using undersized bolts is a common cause of failure.
What to do instead: Verify that the bracket comes with all required hardware. If not, purchase high-quality lag bolts (for wood), wedge anchors (for concrete), or toggle bolts (for metal studs). Match bolt size and length to the manufacturer’s specs.
❌ Mistake: Choosing Based on Price Alone
Why it’s bad: The cheapest bracket may save you $20 upfront but cost you $200 in repairs or injuries later. Low-cost models often use thin steel, poor welds, and minimal corrosion protection.
What to do instead: View the bracket as a long-term investment. Spend a bit more for a reputable brand with solid construction and a good warranty. Mid-range brackets ($60–$100) often offer the best value.
❌ Mistake: Not Checking Wall Compatibility
Why it’s bad: A bracket designed for wood studs won’t work on concrete without proper anchors. Conversely, masonry anchors are overkill and difficult to install in wood.
What to do instead: Identify your wall type before buying. Choose a bracket compatible with your mounting surface, or be prepared to purchase additional hardware.
❌ Mistake: Skipping the Level
Why it’s bad: An uneven bracket causes the bag to hang crooked, leading to uneven wear, increased stress on one side, and a poor training experience.
What to do instead: Always use a level during installation. Mark drill points carefully and double-check alignment before tightening bolts.
❌ Mistake: Ignoring User Reviews
Why it’s bad: Product descriptions can be misleading. Reviews reveal real issues like poor packaging, missing parts, or design flaws not mentioned by the manufacturer.
What to do instead: Read at least 10–15 reviews from verified buyers. Look for patterns—multiple complaints about the same issue are a red flag.
Budget Guidelines: How Much Should You Spend?
- Entry-Level ($30 – $50): These brackets are suitable for light use with bags under 50 pounds. They’re often made from thinner steel and may lack powder coating or reinforced joints. Best for occasional training or kids’ bags. Expect a 1-year warranty and basic hardware. Brands like Yes4All or ProsourceFit offer budget options, but inspect carefully for quality.
- Mid-Range ($50 – $100): This is the sweet spot for most home users. Brackets in this range offer solid steel construction, good load capacity (100–150 lbs), and included hardware. Look for powder-coated finishes, welded joints, and clear installation guides. Models from Everlast, Title Boxing, and Valor Fitness dominate this tier. They’re durable enough for daily training and often come with 2–3 year warranties.
- Premium ($100 – $180): Designed for serious athletes and commercial use, these brackets feature heavy-gauge steel, reinforced gussets, and advanced mounting systems. Some include vibration dampening, 360-degree swivels, or foldable arms. Ideal for heavy bags (100+ lbs) and high-impact training. Brands like RDX, Combat Sports, and Ringside offer top-tier models with 5-year or lifetime warranties.
- Luxury ($180+): These are professional-grade brackets used in gyms and training facilities. They often include custom mounting solutions, corrosion-resistant coatings, and engineered load distribution. Some are designed for ceiling mounting or multi-bag setups. While overkill for most home users, they’re worth considering if you train daily or host group sessions.
Expert Tips for Getting the Best Deal
- Buy During Off-Season: Retailers often discount fitness equipment in late winter and early spring. Look for sales around February–April, when demand is lower. Black Friday and Cyber Monday also offer deep discounts.
- Shop at Specialty Retailers: Stores like Dick’s Sporting Goods, Academy Sports, or online specialists (e.g., FightCamp, MMA Warehouse) often have better selection and expertise than big-box stores. They may also offer bundle deals with bags and gloves.
- Check for Open-Box or Refurbished: Some retailers sell returned or demo brackets at 20–40% off. These are often in like-new condition and come with full warranties.
- Use Price Tracking Tools: Websites like Honey, CamelCamelCamel (for Amazon), or Keepa alert you when prices drop. Set a target price and wait for a deal.
- Read Return Policies Carefully: Ensure you can return the bracket if it doesn’t fit or arrives damaged. Some retailers charge restocking fees or require original packaging.
- Consider Local Pickup: If available, pick up in-store to avoid shipping damage and save on delivery fees. You can also inspect the product before taking it home.
- Ask About Warranty Extensions: Some brands offer extended warranties for an additional fee. This can be worthwhile for high-end brackets.
- Test Before Full Use: Once installed, hang a lighter bag first and test for movement, noise, or stress. Wait 24 hours before mounting your full-weight bag.

Frequently Asked Questions
Q: Can I mount a punchbag bracket on drywall?
A: No, not safely. Drywall alone cannot support the dynamic forces of a punchbag. You must anchor the bracket into structural framing—wood or metal studs, concrete, or brick. If studs aren’t aligned, use a backing board mounted between two studs to distribute the load.
Q: How far should the bracket extend from the wall?
A: Most brackets extend 6–12 inches. This allows the bag to swing freely without hitting the wall. For heavier bags or high-impact training, opt for 8–12 inches. Measure your room to ensure there’s enough clearance.
Q: Do I need a swivel bracket for a heavy bag?
A: Not necessarily. Swivel brackets are better for speed bags or double-end bags that require rotation. For heavy bags, a fixed or limited-swing design provides more stability during power strikes.
Q: Can I use the same bracket for different bag sizes?
A: Yes, as long as the bracket’s weight capacity exceeds the heaviest bag you plan to use. However, larger bags may require longer chains or straps to maintain proper height.
Q: How do I prevent the bracket from rusting?
A: Choose a powder-coated or galvanized bracket, especially for garages or outdoor use. Avoid scratching the finish during installation. In humid environments, wipe down the bracket occasionally with a dry cloth.
Q: What’s the difference between a wall bracket and a ceiling mount?
A: Wall brackets attach to vertical surfaces and are easier to install. Ceiling mounts transfer the load to ceiling joists, which can handle more weight but require more complex installation. Ceiling mounts are better for very heavy bags or high ceilings.
Q: Can I install a bracket myself?
A: Yes, if you have basic tools and follow instructions. Use a drill, wrench, level, and stud finder. If you’re unsure about wall type or load distribution, consult a professional.
Q: How often should I inspect the bracket?
A: Check monthly for loose bolts, cracks, or rust. Tighten hardware as needed. After intense sessions, listen for creaking or movement—these are signs of stress.
Q: What if my wall doesn’t have studs where I need them?
A: Install a horizontal backing board (e.g., 3/4-inch plywood) between two existing studs. Mount the bracket to the board, which distributes the load across multiple studs.
Q: Are there brackets for outdoor use?
A: Yes, look for galvanized or stainless steel brackets with weather-resistant coatings. Ensure all hardware is also corrosion-resistant. Avoid using indoor brackets outside.
Our Final Recommendations
- Best for Budget-Conscious Buyers: Yes4All Heavy Duty Wall Mount Bracket – At under $50, it offers solid steel construction, 100-pound capacity, and easy installation. Ideal for light to moderate use.
- Best Overall Value: Everlast 2-Inch Heavy Bag Wall Mount – Priced around $70, this bracket features 12-gauge steel, a 150-pound capacity, and a powder-coated finish. Reliable, durable, and widely trusted.
- Best Premium Option: RDX Heavy Duty Wall Bracket with Swivel – At $130, it includes 360-degree rotation, reinforced gussets, and a 200-pound rating. Perfect for serious trainers and multi-discipline use.
- Best for Beginners: Title Boxing Wall Mount Bracket – Simple design, clear instructions, and included hardware make this $60 bracket ideal for first-time installers.
- Best for Advanced Users: Combat Sports Pro Series Bracket – Engineered for gyms and professionals, this $160 model supports 250+ pounds, features vibration dampening, and comes with a lifetime warranty.
Conclusion: Making the Right Choice
Choosing the right punchbag wall bracket is about more than just holding up a bag—it’s about safety, performance, and peace of mind. A quality bracket ensures your training is effective, your equipment lasts longer, and your space remains intact. By focusing on weight capacity, build quality, and proper installation, you can avoid common pitfalls and invest in a solution that grows with your fitness journey.
Remember, the cheapest option isn’t always the best, and the most expensive isn’t always necessary. Match the bracket to your specific needs: your bag weight, wall type, training intensity, and budget. Read reviews, follow installation guidelines, and don’t hesitate to ask for help if needed.
Your punchbag is only as strong as its weakest link—and that link is often the bracket. Choose wisely, install carefully, and train with confidence. With the right setup, every punch, kick, and combination will land with power and precision. Now go build the gym you’ve always wanted.